This is a
simple guide to creating highly successful pewter casts from your PLA 3d
printer
Guest Blogger - Martin Vieregg from Kapiti College using an Ultimaker 2 3d Printer
First begin
by printing your design. We have had
most success with prints that did not have too many thin (1mm or less)
features. Some designs you think
couldn’t work can prove you wrong; the key is how you mount your object and its
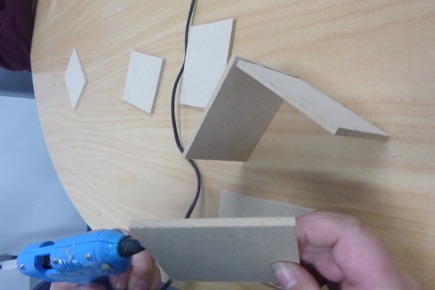
risers within the empty space. I found that a simple MDF box glued together
with hot glue works fine.


Make sure
there are no gaps to allow wet plaster to leak from. Each printed part you want to cast will need
two tubes hot glued to them in strategic places. I tried to 3d print tubes but found that glue
sticks work just as well. One tube will
allow for you to pour the pewter in and the other to allow air to escape. Ideally they would be on opposite ends of the
print but this may not always be possible.
You also need to think about how to avoid bubbles being trapped under
your print when you add your plaster. Your printed
part can now be glued into position using a small off cut as a bridge ensuring
no part of it touches the sides. Ideally
you should mount it toward the bottom of the box and there should be a gap of
at least 10 mm to the wall and any extra prints you may want to mount inside
box.
Mix a ratio of approximately 1
part (cleanish) sand to 5 parts plaster (GIB plaster works fine). The sand helps to keep your brick from
crumbling after burning. Add water and carefully
mix the plaster to a consistency best resembling soup and pour the contents
into your MDF box. Try to avoid
introducing too many bubbles.


Your brick
can be fired that evening in a regular closed fireplace. Place your dry brick upside down on some good
coals in your fireplace so the PLA can melt and drain out. PLA is derived from corn starch so is
harmless to burn.
You can remove the MDF
if you want to but this can sometimes crack your brick. After about 2 hours the brick will be glowing
red hot and all traces of PLA will have evaporated. Just to make sure I turn them over for 10
minutes before I remove them very carefully with tongs.
Like any good baking you should let it cool
on a tray. From this point on treat the
bricks as if they were eggs. Any slight
knock and they are prone to cracking.
You may notice that they have a strangely Sulphuric pong to them, don’t
be alarmed or look for someone else to blame.
You can now heat the pewter using an LPG torch and pour into your
moulds. Keep adding pewter until the
other hole begins to fill.


Leave to cool
for 10 minutes and gently break open your brick. This is the most exciting part of the whole
process. Many times I have been stunned
at the level of detail on the pewter, revealing lines from the finest prints.
The metal will still be hot so cool off completely in cold water.
The final process is to clean the remaining
plaster mix from your metal part.
Depending on the end result you may choose to sand and polish your part
or leave the beauty of the printed lines.
As a process I feel it pushes the possibilities of desktop printing
adding an extra dimension to the end result.


