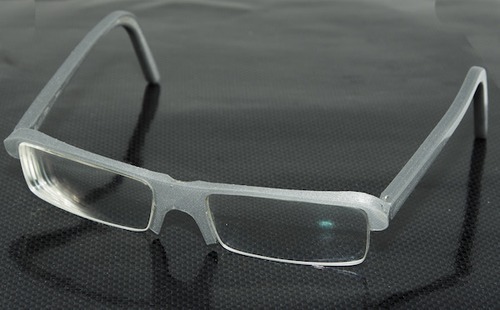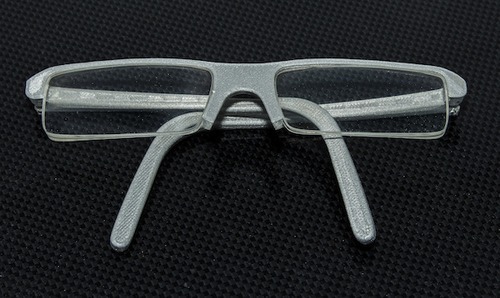
Broken eyeglass frames are no fun. Replacing them can be pretty costly and you might be in for a long wait. How about printing them out? Hub owner Arne Dürr tried this himself recently and was kind enough to share some how-to tips with us.
Meet Arne Dürr
Arne is an all round developer and owner of D-Byte, a company which develops software and 3D models for web and mobile applications. He joined our platform as a Hub just over a year ago, after assembling his own Ultimaker. In recent months, Arne found himself in a dilemma. His metal eyeglass frames broke just a few weeks before he was scheduled to get laser surgery for his eyes. Spending a lot of money on new frames was not an option, so 3D printing offered an interesting alternative. “There are several nice models for glass frames online, but there was nothing that fit the shape of lenses perfectly,” says Arne. “So I created my own using PLA filament, 0.8mm of metal wire, fishing wire, my old glass lenses, and a bit of super glue.”
Here’s how he did it
Step 1The first step is to trace the shape of your glass frames and lenses on a piece of paper. Then, measure the height and the width of your glasses, so you can later trace and adjust your hand-drawn image in an app like Sketchup.
Step 2After importing your sketch image into Sketchup, resize the image and make a 2D model of the frame using the measurements of your old frame. Remember to include room for the hinges at the base of your temples (or earpieces), so you can connect them with the front of the frame. In addition, you will need to create 6 holes at the sides to assemble the pieces (see model for reference). To make things easier, you can choose to draw only one half of the frame and mirror the other half.
Step 3
Since every nose bridge is different and there is no straightforward way to measure the shape of your upper nose, modelling this part of the frames is tricky and will require some test prints to get the right size and fit. The temples are a bit easier. You can print them in a curved shape (with supports) or leave them in a straight shape, which will immediately give you a more polished finish.

Step 4
If you need to adjust or bend the frames to fit the shape of your face better, you can bend them with a hair-dryer. Aim the hair-dryer at the frames and bend them at will. Set them down and wait for them to cool.
Step 5Once your frames have cooled down, put some fishing wire through the holes in the hinges, making sure that you leave enough wire to hold your lenses in place. Then, put the lenses in one at a time and pull on the wire on the corners of the frame until your lenses are properly tensed up. Seal off the gaps with a little bit of superglue. Finally, to join the frame and with the temple, re-drill the holes at the sides using a 0.4 or 0.5mm drill and connect the pieces with a small nail or a string of metal wire.
Printer settings
For a nice finish, Arne recommends that you print the frames with PLA directly on a glass heatbed (55c to 60c). When generating your G-code, choose the Brim option under “platform adhesion type” to prevent your prints from coming loose or start warping.The proper layer height should be anywhere between 0.06 and 0.1 and 99% - 100% infill. Materials like Colorfabb XT, PLA/HPA and Woodfill will deliver great results.
Check out Arne’s frames on Thingiverse to learn more and start printing your own.